Showing posts with label Sewing. Show all posts

Friday, July 8, 2011

My Colors are ...

are not blush and bashful but rather yellow, white, gray, blue, and green or at least I am trying to combine these for our living room. I started with just making some pillows to add a little color.


These pillows are with the envelope back, and are really not that hard to make. Believe me! I like the envelope back because I can change out the pillow covers very easily.


The pillow forms are actually pillows that I got at Dirt Cheap for $1, and I got the fabric from Fabric.com awhile back.

I love how they turned out!

Photobucket

Friday, February 25, 2011

For the Love of Fabric

I love fabric! It just makes my heart smile! The colors, texture, and patterns are so beautiful that sometimes I have a hard time even wanting to cut it!

Recently, I put all of my fabric in one place. It now fills up my hope chest. Maybe I hoping to get some projects finished ...


Probably starting with this ...


Friday, January 21, 2011

How to Make No-Sew Burlap Curtains

My sister came last weekend, and I mentioned that we made some burlap curtains. These will be short panels that she will tie up with ribbon. I will show you the process that we did, but due to not having a finished, hanging curtain, I will show you one of my panels that I made last year for our bedroom.

Supplies:
Burlap
Heat and Hem tape
Iron
Measuring stick


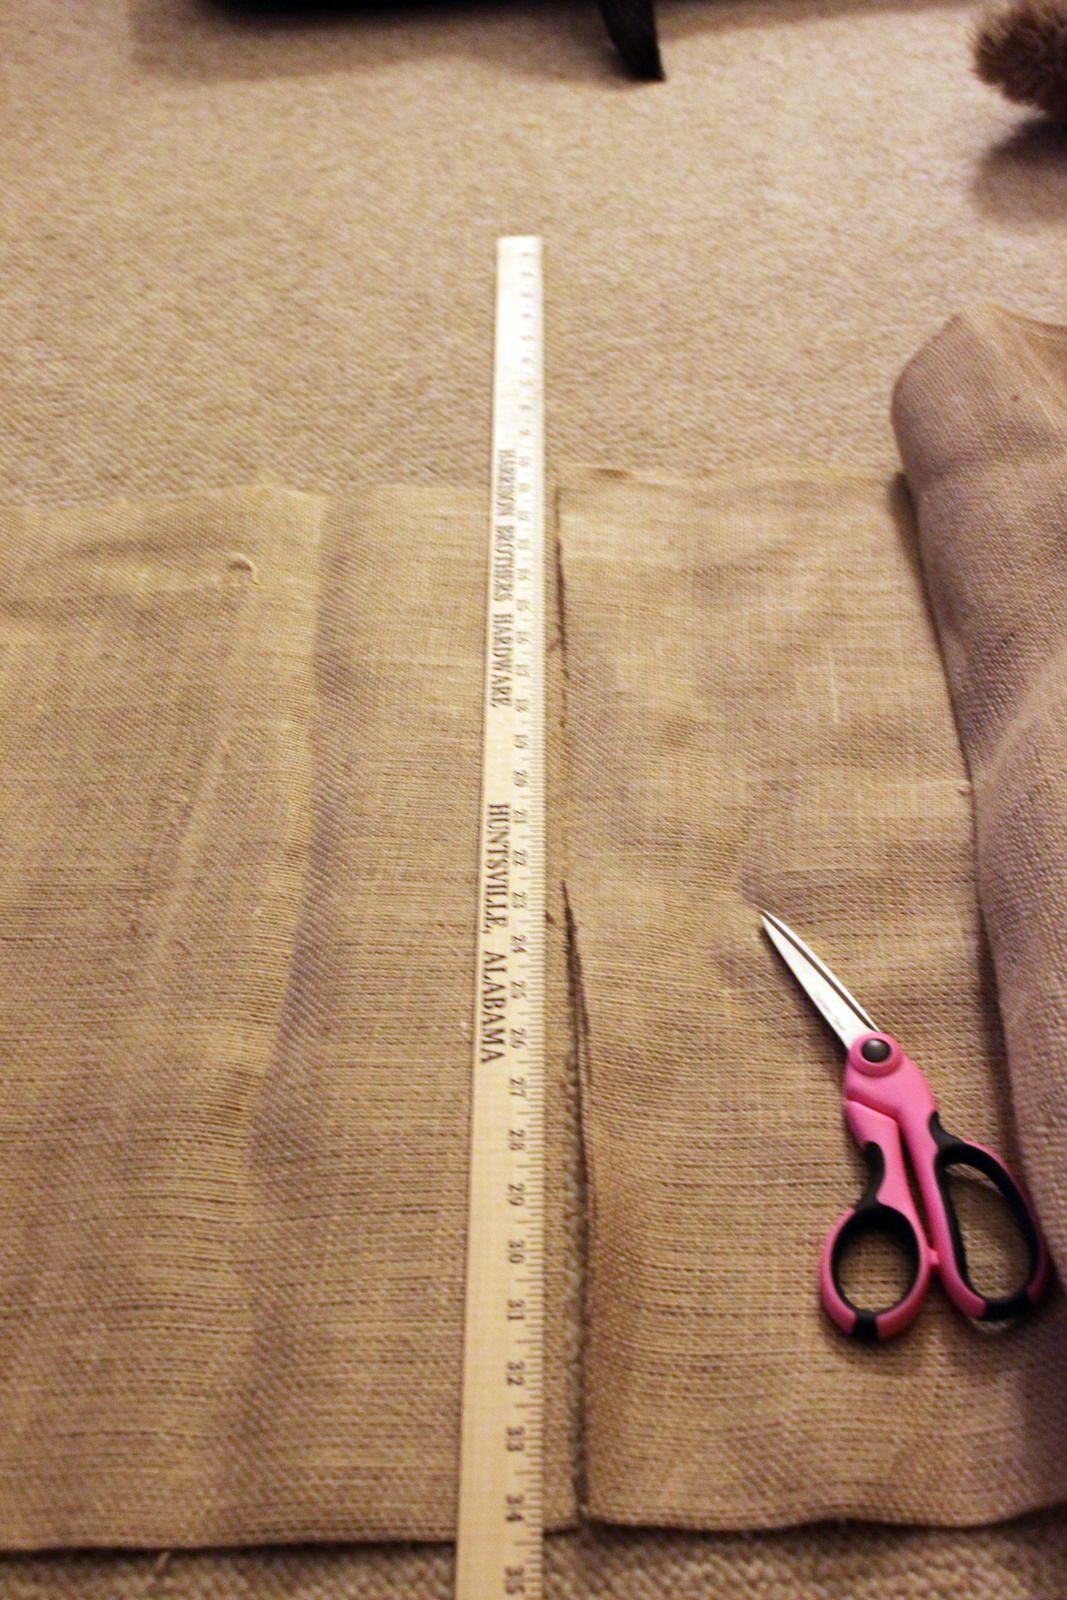
We got seven yards of fabric for four windows. We used five feet for each window.

Realize that burlap comes in 36-48 inches wide. I chose to fold our fabric and then cut across the top hortizonally. I did not cut in half vertically, because burlap's sides are already hemmed. I did not want to mess that up and have to re-hem. That and I am really lazy when it comes to that.

Measured out five feet for each window.


There is a secret to cutting burlap. I remembered on the last cut. Ha! When you go to make your first cut, cut just 3 inches and then pull a string. It should create a line that goes all the way across your burlap for a perfect cutting line.


We will make the part of the curtain that will hang on the rod. Take each panel and place your heat and hem tape about five - six inches down. Then fold the top of your burlap on top of the tape.


Set your iron on high, and then iron away, pausing about 10 seconds on each section. 


Your pocket should look like this.
 

Next, take the bottom of your panel and go about 2-3 inches with the tape. You don't need a big pocket here, just enough to hem it. 


You can either hang on a curtain rod or with clips like I did in our bedroom.


 It does help if you have two people doing this. One to iron as the other holds. It took us about 1 1/2 hours to make 4 panels. If you have any questions, let me know. Sometimes tutorials are confusing.

Oh, by the way, did you notice my new ironing board cover?


 Ken's parents gave it to us for Christmas. It is very old and very vintage. In fact, I even think that my Aunt Dovie may have sewed this when she worked at the GEM plant in Byhalia where Ken's Dad worked in the late 70's early 80's. That makes me smile, because I really missed Aunt Dovie this Christmas.

Why did I get a new ironing cover, you ask?


Because sometimes your projects go up in smoke!


Thursday, January 13, 2011

More Flirty Straps

I just wanted to share some more flirty straps that I made. I am having a lot of fun making these. This was part of Brook's Christmas. She said that she likes the colors blue and green and makes black and red look good!


Here are some more combinations:


These are a lot of fun to make and not very hard at all. So if you are scared of your sewing maching like I was, this is the perfect project to get you over your fear!


Friday, January 7, 2011

Onesies

I was behind on some baby girl gifts, and decided to finally whip these up! Maybe one day, I will be able to show you a tutorial, but for know, you can use these for inspiration!


Front


Back


Front


Back


What my creative corner looks like during the process!


My mother stiched around them for me since at that particular time, I feared my sewing maching. I am over that now, so who knows, may someone will have a little boy for me to try some things.

Friday, December 17, 2010

A Flair of Fabulous!

I have seen a couple of these necklaces everywhere, and decided to make one myself as well as write a somewhat of a tutorial so that you can make one for yourself. If you decide to do this, make sure that you pop your favorite movie in because this project does take a while.

Here is the supplies:


Satiny material. I chose black and gray. I got 1/2 a yard of each. (You can make two necklaces out of this).
Matching thread
1/2 yard of ribbon (unless you are making two necklaces, then you will need 1 yard of this).
Needles
Scissors
Black Felt
Sparkly faux rhinestones or sparkly buttons
Hot glue gun


Cut your fabric. It does not have to exact or measured. I just doubled my material and cut from one end to the other. I kept (3) of the long strips and then cut (2) of the long strips in half to make (4) smaller strips.


Next. Take your thread and thread your needle.


Then take one end of your material ...


And roll it


Secure this end with thread.


Continue twisting your fabric as you roll it around your rolled end piece.


As you roll, ever so often, secure your rolls with your thread. It does not have to be pretty. Just play with it until you are comfortable.


Make several of these. I made 7 of each color - 3 big ones and 4 little ones.


Next, take your felt. You will need to make two bases. I will show you why in a minute. Take your felt and fold it in half twice, and then cut. This way you get two bases that are the same. You can make you a template to how you want your necklace to lay or just wing it like I did.


Next, get your hot glue gun ready and begin playing with your layout.


Once you have your layout like you want it, begin hot gluing them down. You can also secure them in place with thread if needed. I did not, because I felt pretty confident that my rosettes were secure.

Add your ribbon to the back of the felt using your hot glue gun. You may have to fold the ribbon to make it lay right.


Put the other piece of felt on the back to better secure your ribbon and to give it a cleaner, simpler look.


Add your sparklies and this is what you get.


I made this for less than 10 buckaroos.

This is what I used for inspiration.


If you like this one, you can find it here for $129.00.


Hope you have a fabulous weekend!

I am linking up on

UndertheTableandDreaming

Photobucket

LinkWithin

Related Posts Plugin for WordPress, Blogger...